Vik Booking Official Documentation

In order to configure the Booking Engine in the front-end, these are the steps you should follow to have a basic configuration of a room:
- Create one Tax Rate
- Create one Type of Price
- Create one Room
- Enter the costs per night from the Rates Table
- Add a new Joomla Menu Item of type VikBooking - Search Form or Rooms List for the front-end
By following the 5 steps above, the system will allow bookings in the front-end. Then you can create some Characteristics, some Options and you can apply Tourist Taxes and configure the pricing for your various seasons.
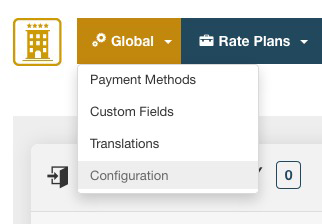
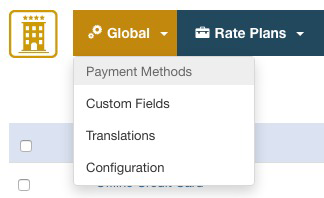
The Configuration of VikBooking is divided into 4 tabs
Tab Main Settings
Booking:
- Booking Enabled - With this option you can enable or disable the Booking service, an offline message is available
- Admin e-Mail - The eMail of the administrator that will receive the notifications for new bookings as well as payments
- Manage Checkin and Checkout times - check-in time is supposed to be at a later time than check-out
- Check-in/out Date Mode - choose the right date format for your clients.
- Bookings for today at any time - if disabled, bookings for today's date after the check-in time will not be allowed
- Enable Coupons - if enabled, the form for entering the coupon code will be displayed at the booking summary page
- Enable Customers PIN Code - if enabled, when users are not registered or logged in and no cookies are available, customers will be able to enter their PIN code to get the billing information fields populated automatically
- Token Form Order Submit- This is a security measure that saves a crypted value in the session. Made for
- Require Login - If this setting is on the user will be forced to register or login before saving the order
- Minutes of Waiting for the Payment - When the booking status is Stand-By, the rooms chosen are kept as locked for this amount of minutes. During this period it will look like the rooms were already paid. Once these minutes will expire, unless the bookings has been confirmed, the rooms will become available for booking again
Search Parameters:
- Days in Advance for bookings - the closest allowed arrival date for bookings will be set to today plus this number of days
- Minimum Number of Nights - a global minimum number of nights for bookings. If this changes depending on the period, leave this to 1 and use the Restrictions
- Number of Rooms - the maximum number of rooms that can be booked with one order. This will affect any search form
- Number of Adults - the min and max number of adults that any search form will display in the drop down menu for bookings
- Number of Children - the min and max number of adults that any search form will display in the drop down menu for bookings
- Maximum Date in the Future from today - this will generate the maximum date in the future allowed for bookings. By default is 2 years
- Availability for Multiple-rooms search - choose the type of search engine to use for displaying the rooms in the search results when users are booking more than one room. Properties with a low number of units available for their rooms/apartments like 1 or 2, should set this to Dynamic. This way if there is one unit available only for some dates and the users are searching for two rooms where the same room can suit the party/request, the system will hide this room for the choice of the second room when this is chosen as first room.
- Choose Rooms Category - if enabled, any search form will display a drop down menu for filtering the rooms by Category
- Show Number of Children - Choose whether to ask the number of children in the search forms. If disabled the children will not be mentioned
System:
- Enable Multi-Language - if enabled, the internal translations will be used
- SEF Router - if enabled, the internal router will be used for rewriting the URLs with the alias of the rooms
- Load Bootstrap CSS - choose whether VikBooking should load Bootstrap for a better rendering of the pages
- Load jQuery Library - The component needs the jQuery library, depending on your template, this setting can be OFF
- Calendar Type - VikBooking has two types of calendar: the native Joomla Calendar, a basic calendar with no customization, nor custom configuration or the jQuery UI Calendar, light and easy to customize with many features. Make sure that the modules of your website will not cause javascript libraries conflicts or this calendar will not work. Using the jQuery UI Calendar is strongly recommended
Tab Prices and Payment
Currency
- Currency Name - the name of the default currency. This should be the 3 Chars-Code of your currency (USD, EUR, GBP etc...)
- Currency Symbol - the symbol of your currency. HTML entities are allowed i.e. € will produce the Euro symbol
- Transactions Currency Code - some payment gateways like PayPal will use this setting. This must be the ISO-4217 Currency Code of your country, 3 chars long like USD, EUR, GBP...
- Number of decimals - define the number of decimals that should be used for the numbers format. Some currencies do not have decimals
- Decimals Separator - define the character to be used to separate the decimals. Usually a comma or a dot. The dot " . " is used by default (90.95)
- Thousand Separator - define the character to be used to separate the thousands. Usually a comma or a dot. The comma " , " is used by default (100,000.00)
Tax and Payments
- Prices Tax Included - if this setting is disabled and a tax rate exists and is assigned to the tariffs, taxes will be added to any price.
- Show Tax in Summary Only - if enabled, all taxes will be displayed in the booking summary, the last step of the booking process. Otherwise any previous steps will display the prices with the taxes applied
- Allow Multiple Payments for one Order - if enabled, when the total amount paid is lower than the booking total, customers will be able to place other payments for the remaining balance
- Pay Entire Amount - when disabled, users will be asked to leave a deposit to confirm the booking, either a percentage amount of the booking total or a fixed amount
- Payment Transaction Name - some payment gateways require a name for each transaction. Define the default text to be used
Tab Layout
- Calendars first day of the week - choose the first day of the week that any calendar will display. Some countries prefer Saturday or Sunday to Monday
- Number of Months to Show - this is to define the default number of availability calendars that each room will display in the details page
- Show Partly Reserved Days - when rooms have more than unit available, if only some units have been booked, the remaining units will be displayed in Yellow/Orange as partially available/reserved
- Front Title - Usually a heading tag placed on top of the pages in the front end, this can be your company name. This value can also be empty.
- Front Title Tag - You can write a tag for the style of the title (h3)
- Front Title Tag Class - you can write here a Css class for the style of the title.
- Page Text -You can write an opening and closing text for the page where the user makes the reservation with the form.
- Closing Page Text - This text will be placed right below the search form.
Tab Company and Orders
- Send order emails with JUtility - Some servers might require this setting as On. If it's Off, the system will not use the native Joomla class for sending emails but another one that has a better way of embeding images in the order emails.
- Company Logo - The logo of your company, a jpg, gif or png image file that will be included in every order email.
- Footer Text Order eMail - This HTML text can be placed in every order email at the bottom of the page.
- Disclaimer- a text showed in the page of the front site when the user is selecting the the type of rate and the options. This should not be used for the Terms and Conditions. Read the Custom Fields section for further information.
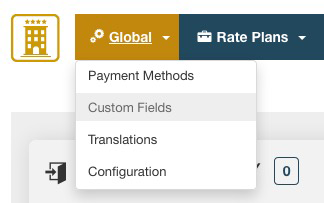
From this task you can manage all the fields that the users will have to fill in before saving the order.
During the first installation of VikBooking, some fields are created by the program but it's always possible to manage these fields.
The field types are:
- Text - the user will have to fill in an input text field
- TextArea - a text area with more rows will be shown
- Select -a select menu is shown in this case, you can create all the select options from the same task
- Checkbox - a checkbox field will be displayed
- Country - a list of countries in a drop down menu
- Separator - this field is not an input field but just a text separator. It can be used for dividing the Purchaser's Information from the Billing Information. If the text of this field is longer than 30 chars, a different style will be applied to it. Some people use for writing extra information.
The field name is the label that will be next to the input field or the text of the separator.
If your website is multilanguage, the label should be a definition inside the .ini language file of each language that you have.
For example, the field Address should have a label like ORD_ADDRESS and each .ini file of VikBooking that you have should contain a row like this:
ORD_ADDRESS="Address"
From VikBooking 1.6 the custom fields can be translated with the internal translator tool.
A field can be required or not, in this case the system will check that the user provided something for that information.
If the field type is Text and the setting Is Email is On, that email will be used to send the order email. Make sure to have only one custom field of type Text, Required and marked as "is eMail". There is no need to have more than one because the system will validate that the email is valid. A field like "confirm email" would be useless just like having more than one field marked as email.
It is strongly recommended to have at least two custom fields of type text, required and marked as "is Nominative". The system will use this to get the first and last name of the customer.
Another important setting of the fields is the Popup Link. This function is usually used when the field type is Checkbox and the user has to accept something, the Terms and Conditions for example. The popup link is a page that is opened in a modal box every time the user clicks on the label of the field. The modal box is "modern" popup that is never blocked by any browser and leaves the user in the same page.
Usually the link should be a Joomla article link with an additional parameter in the query string like &tmpl=component.
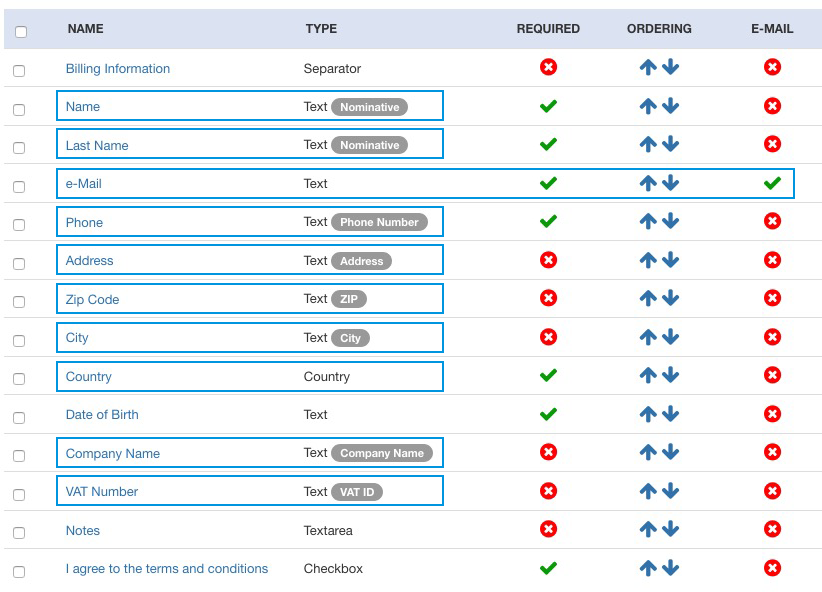
Here is a screen shot that shows a correct configuration of the Custom Fields. It is important to keep a correct configuration in order to let the system add customers to the database and to use all the management functions correctly (Invoices, SMS, Cron Jobs etc..):
The Customers page will let you manage all the customers of your property. This function is useful to keep track of all your clients who made a booking for their stay so that they will be able to find their billing information populated at the next bookings.
One customer record will store the following information:
- First Name - first and, optionally, middle/second name of the customer.
- Last Name - the customer's last name.
- eMail - the primary email address of the customer.
- Phone - the phone number of the customer inclusive of the prefix.
- Country - the country of residence of the customer.
- Joomla User - in case the customer has a login name for the website, a relation between the Joomla Users can be created.
- PIN Code - the unique personal identification number of the customer, 5 digits, integer number. This code is used for storing information in a cookie sent to the customer's browser so that at the next bookings the custom fields will be populated automatically. The PIN code is sent to the customer together with the booking confirmation email.
Every time a customer makes a booking, the system will create a record for the new customer unless a record for the same email address was already saved. However, in order to have the system store the customers records in the database, you need to have the Custom Fields configured correctly:
the system requires to have two custom fields of type Text, Required and marked as Nominative; one custom field of type Text, Required and set as eMail; optionally you can have one custom field of type Text, marked as Phone Number and one field of type Country.
With the Translations page you can translate any content of the database that was created through VikBooking such as the names and the descriptions of a Room, the names of the Rate Plans, the Characteristics or the Custom Fields.
Wordings like "Book Now", "Room", "Confirm Booking" etc... do not need to be translated through this function because those are handled by Joomla with the .INI Translation files.
This page will list all the Languages that you have installed on your Joomla website. For installing new languages use the Language Manager page of the administrator section or download the translation packages from joomla.org.
Please notice that the default language for the front-end Site, configured from the Language Manager, should be the one that you use for entering the default names and descriptions of the Rooms and everything else. Basically, all the contents that you create with VikBooking should be in the same language as the Default one set from the Language Manager page of the administrator section for the Front Site.
By choosing a content type from the drop down menu on the right of the page, the system will load the original translations for that content (Rooms, Categories, Types of Price, Characteristics, Options, Special Prices, Custom Fields, Payment Methods etc...) and you will be able to create a translation for any other language than the default one for the Site.
There is a configuration setting for allowing the Multi-language contents so make sure this is enabled.
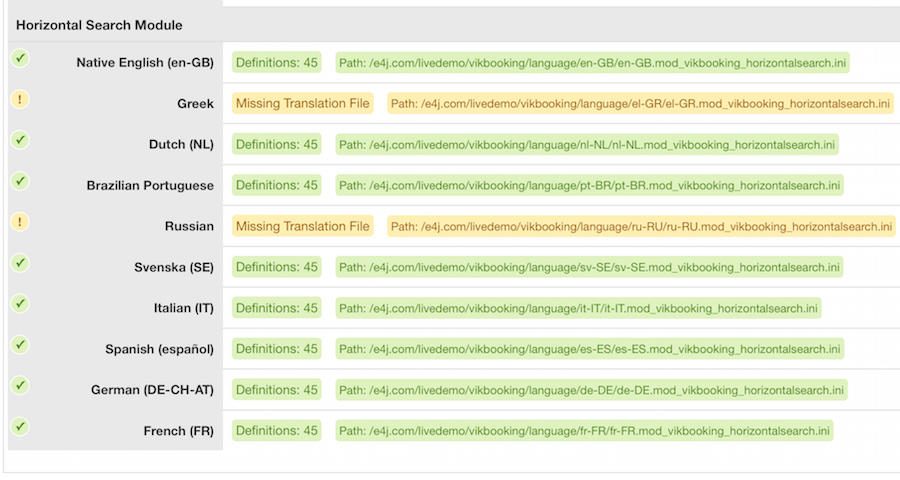
Still from the page Translations it is possible to get an overview of all the .INI Language Files that should be on the server so that no language definitions will be missing for some languages, for the component VikBooking or for some Modules like the Horizontal Search or the Currency Converter.
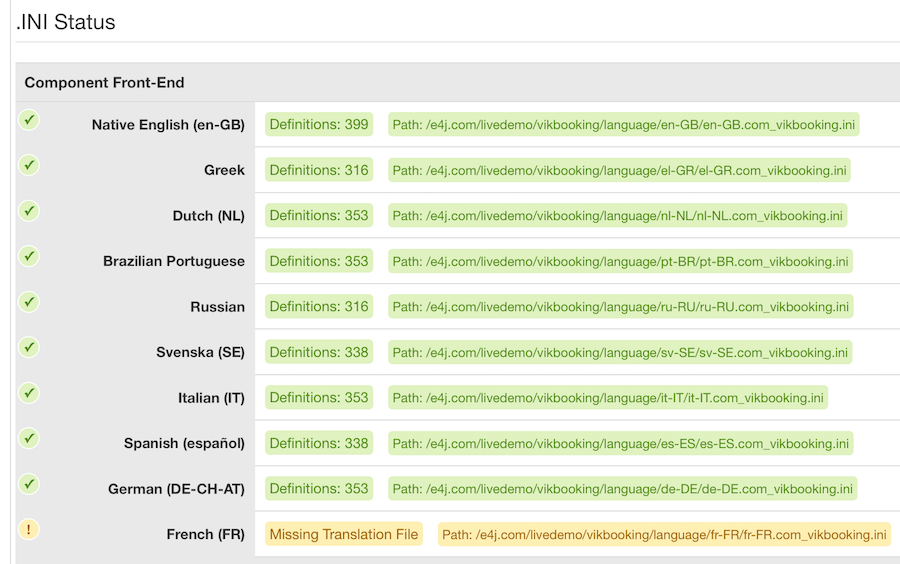
By clicking on the last tab to the right called .INI Status, the system will list all the default .INI files of VikBooking for the component, front and back -ends, and for the modules. Please notice that it is not required to have all the .INI Files translated into all the languages that you have, in case some files will be missing or in case some translations are not available, Joomla will revert to the default English language definitions.
The screen shot below shows that the .INI Translation Files for the front-end part of VikBooking (component) are all available except for French. However, not all the available translation files have the same number of rows (number of definitions) and this means that some translation files are outdated, meaning that they were made for a previous version of VikBooking so some definitions are missing. In these cases it is necessary to open the default English .INI language file and compare it with the outdated translation file of another language. The number of rows will be different and it is sufficient to copy all the missing translations at the bottom of the English file onto the other language .INI file so that the number of rows will be the same. At that point it is necessary to translate the missing language definitions for having the .INI file updated.
This screen shot instead shows how the translation files for the Horizontal Search Module are all updated to the latest version because they all contain the same number of Definitions. However, the rows in yellow show that the .INI Translation Files for Greek and Russian are not on the server. This means that the module will be displayed in English when the front Site is visited in either Russian or Greek.
From this task you can manage the methods of payment for your website. Paypal, Bank Transfer and Offline Credit Card are pre-installed but disabled by default after the installation.
The method of payment chosen by the customer will affect the status of the booking that can be either Pending (Stand-By) or Confirmed.
In case all the methods of payment are disabled, every booking will be considered by the system as Confirmed and the user will not be asked to select any method of payment.
In case the payment option requires the validation of a payment, the setting Auto-Set Order to Confirmed must be DISABLED or the status will be set to Confirmed before requesting the payment or before starting any transaction. Payment options like PayPal where a payment is required should have that setting DISABLED while you can enable it in case you want the booking status to be Confirmed when that payment option is selected.
The payment option Bank Transfer is a flexible method for giving the customers certain instructions for the payment through the Notes field such as your Bank Account Number (IBAN). Some Properties offer a payment solution for paying upon arrival. In this case it will be sufficient to rename the Bank Transfer to anything like "Cash" or "Pay Upon Arrival". In this case, properties should decide what status to apply to the bookings where the customers chose to pay by cash or upon arrival. Bookings not Confirmed will not lower the availability of the rooms on the requested dates, they will just keep them as Locked for the amount of minutes defined in the Configuration.
The Payment Name is the title showed in the front site during the order confirmation when the user has to select a method of payment.
The File Class is a php file that is executed by VikBooking to start the transaction and to validate the payment, do not change this unless you are creating a new method of payment.
VikBooking supports customized methods of payment, by creating a new file class .php in the payments directory you can create your own gateway for your bank.
A method of payment can apply a charge or a discount to the total order. From the setting Charge/Discount you can enter an amount, percentage or value that will be added/deducted from the order total. This can be useful if you want to give your clients a discounts if they are paying by credit card.
The Notes field, is a text displayed in the order page in the front site. Usually the notes are shown only if the order is Confirmed, by enabling the setting Always Show Notes, the notes will be displayed in the order page even if the status is Confirmed. For those who use Bank Transfer, this could be useful for showing the information for the payment or other details.
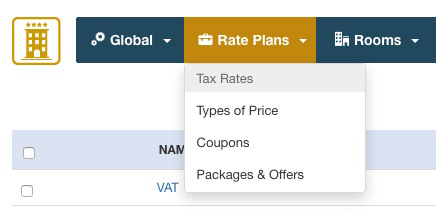
Most countries use just one tax rate. However, in some cases the room stay is affected by a certain tax rate while some extra services sold and booked through the options, may be affected by another tax rate.
Do not create multiple tax rates in case your country has Federal and Provincial taxes or anything similar, use the function Taxes Breakdown to specify how the total tax rate is composed.
You will then be able to assign any Rate Plan or service that can be booked, to one tax rate or none.
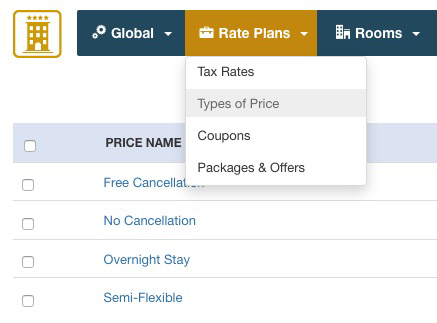
The Types of Price are required for the creation of the rates. It's what most portals call Rate Plans.
In order to be able to enter the rates per night or per occupancy for your rooms, you will need to have at least one type of price.
Some examples of types of price are: "Free Cancellation", "No Cancellation", "Room Stay", "Half Board", "Full Board", "All Inclusive" etc...
The costs per night or per occupancy can be defined for each type of price that you have. For example you can offer a free cancellation booking of the rooms as well as a no cancellation/non-refundable price. Another example is offering a Half Board stay or a Full Board service. This way the customers will be able to pick their type of price and the relative cost of the room.
It is possible to specify a Price Attribute which is a label/explanation text of the type of price. An example of an attribute could be "Services included". From the page Rates Table, where you enter the costs per night for each type of price, you will be able to specify with a text, what services are included depending on the length of stay. For example, breakfast can be included only if the nights of stay are 3 or more.
Please notice that most Hotels do not need this function and you can just give the type of price a name without any Attribute.
Tax Rate: each type of price should be assigned to one Tax Rate or taxes will not be calculated.
For third parties connections with channel manager or meta searches systems, you should define whether the type of price includes breakfast and what's the cancellation deadline if it's free.

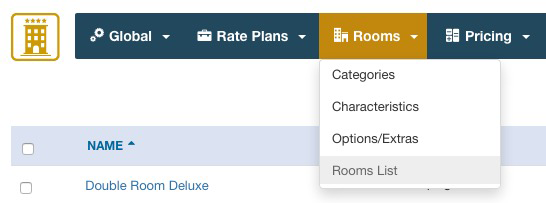
From this page you can manage the categories to which the rooms belong. Categories are useful when the users are searching for rooms because they can filter the results by selecting a category from the search form.
You will only be asked for the category name and for an optional description field that will be displayed in the view type Rooms List filtered by a Category ID.
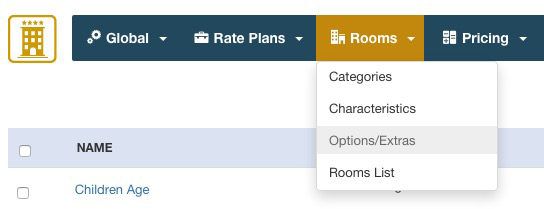
The Options/Extras are services, tourist taxes or fees that the users may want to add to their reservations or costs that should be listed separately from the room stay. Options can be anything, an additional Bed, a Tourist Tax, a Bottle of Champagne, a Resort Fee or any other kind of service/fee.
Options have a Name, an optional description, a cost, an optional tax rate, an optional image and a few Parameters:
- Cost per Night - the price will be multiplied for the nights of staying;
- Cost per Person - the price will be multiplied for the number of Adults;
- Selectable Quantity - if this parameter is on the user will be asked for the units desired, otherwise a checkbox will be displayed;
- Maximum Cost - in case the option price is multiplied by the nights of staying or the units, it is possible to set a maximum cost that the option can reach.
- Only for Children - the Option will be visible only if there are Children;
You can also force the option to be Always Selected, this could be useful in case you need to make the user pay for some service and list this service in the order summary as a separated cost from the rental fare. Tourist Tax for some cities could be an example and some Hotels would rather show this Tax in the Order Summary by checking the checkbox "Show Only in Order Summary". This way the user will see a row for the Tourist Tax in the Order Summary that will be added to the booking total.
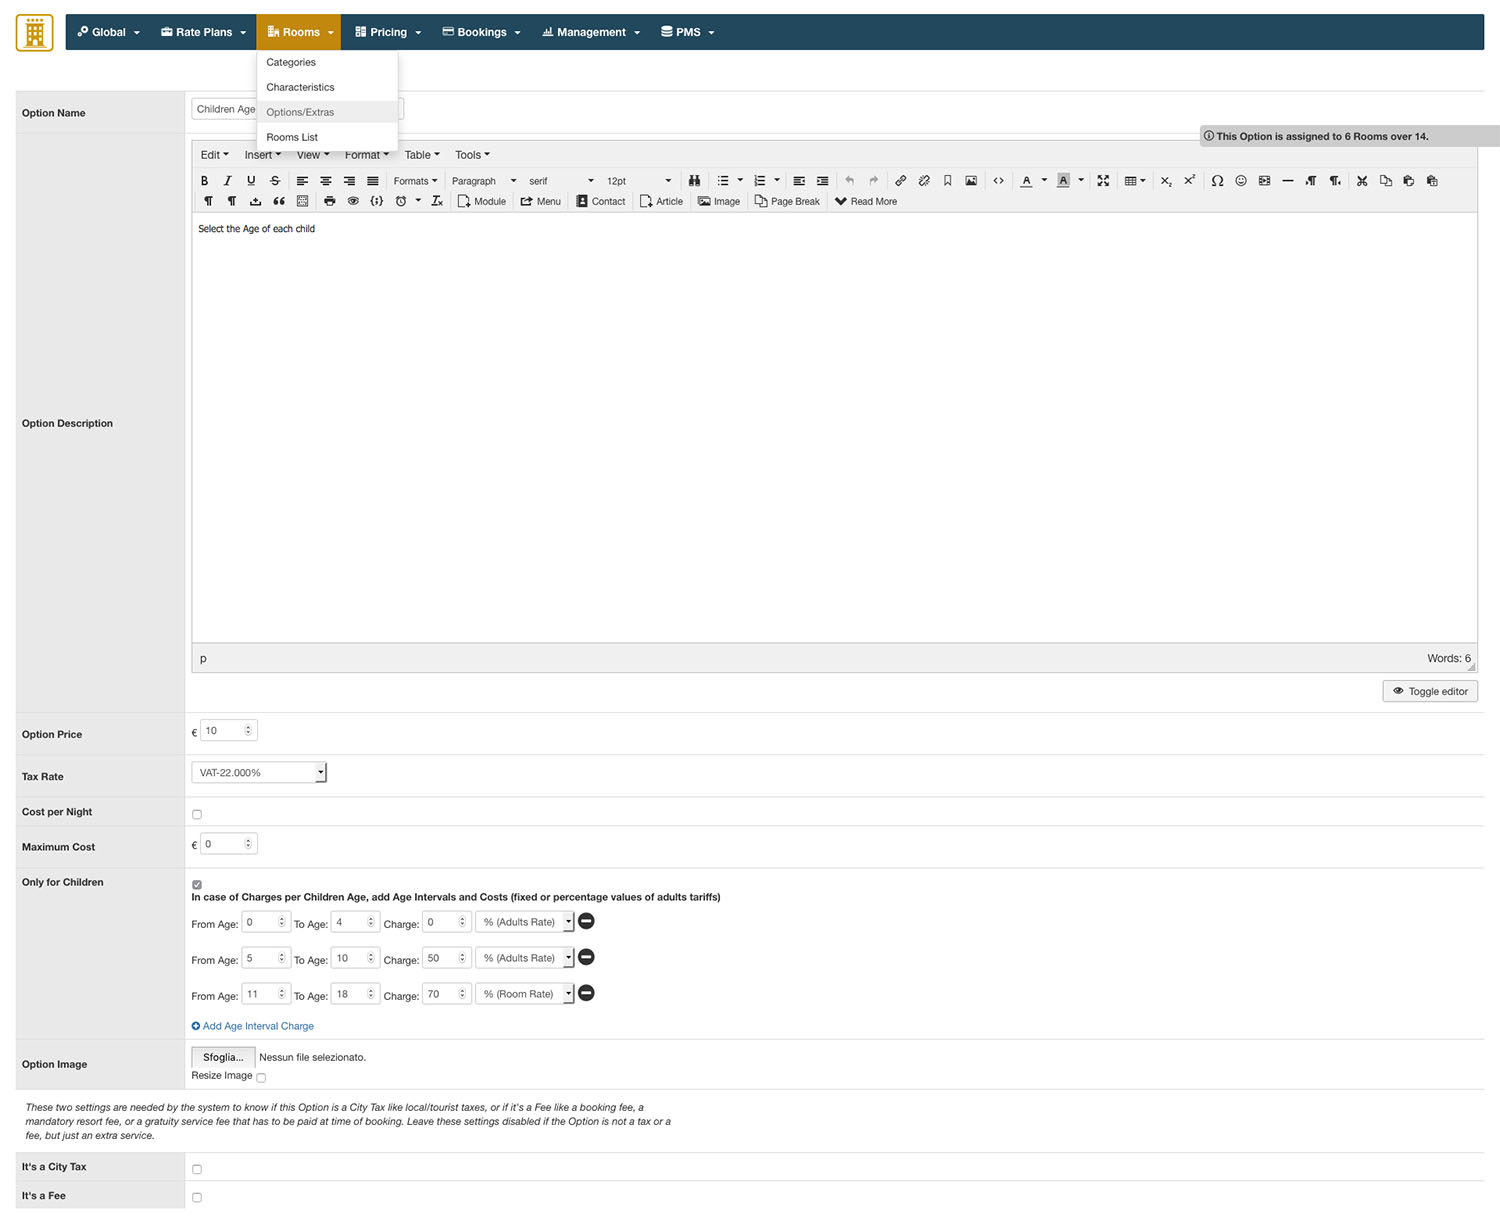
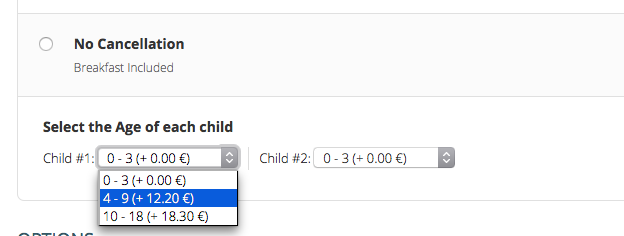
Charges per Children Age: when the setting "Only for Children" is enabled, you can create age intervals and a cost for each interval that the users will have to select for each of their children in the front site. This type of Options are threated a little different than the others, in fact, the selection in the front site is shown underneath the Rates in the page after the search results.
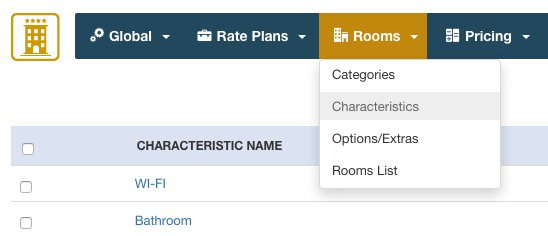
The Characteristics are the amenities of the rooms. Characteristics have a name, an optional icon and a text to be displayed in the front site with a tooltip when hovering the icon. By creating or editing the rooms, you will be able to assign some Characteristics to be displayed.
Before creating the Rooms you are supposed to have created the tax rate(s) and the type(s) of price. The options, the categories and some characteristics/amenities can be created later on.
The Room should be interpreted as either Room Type (like Single, Double etc...), Apartment, Dorm or Room Number (i.e. Double #3 First Floor). The room is what customers will book in the front-end.
When creating a new room, you will be asked to provide some information:
the name, the main image, optionally more images to create an image gallery with a caption text for each image, the category to which the room belongs and a description text, short and long.
Both the Descriptions, small and html, support Content Plugins. The content of the descriptions will be parsed by Joomla so, for example, by using the special syntax , the description will render the module published in your_module_positionthrough the Joomla native Content Plugin "Load Module". Any other Plugin of type Content could be loaded in the descriptions.
Occupancy:
For each room you can define a Maximum and Minimum number of Adults and Children. This way you can define the Occupancy of your rooms.
Please notice that if the minimum number of Children is set to 1 rather than zero, by making a search for 2 Adults and 0 Children for example, the room will not be available. It is also possible to define the minimum and maximum number of total people allowed (Adults + Children).
After saving the room, if this is available also for a number of Adults that is less than the Maximum capacity of Adults, you can create Charges or Discounts for the different usage of the room. This is how the pricing by occupancy can be managed.
Example:
Double Room: Min Adults 1, Max Adults 2. You can create a discount (or a charge depending on your policies) for the usage of the room for 1 or 2 Adults. You can say that if the Adult is only 1 in the Double Room, the cost is the 20% less or $20 per night cheaper.
Units:
Another important detail of the room is the units field. This value will be considered when the system is checking the remaining availability of the rooms depending on the bookings received for certain dates.
You can also assign some of the characteristics (amenities) to the room by clicking on the checkbox next to them. The same thing works for the Options, this way you can only assign some of the amenities and options created before, not all of them.
After clicking on Save, you will be redirected to the fares management page.
In this task you can create the fares for each existing Type of Rate (Price). In order to insert the fares, you have to put the number of nights and the cost per night for each Type of Price.
Example:
You have two types of price: Basic Price and Free Cancellation. By putting from 1 to 10 nights, € 50 per night for the Basic Price and € 60 per night for the Free Cancellation, the system will automatically multiply the prices by the nights obtaining €500 for 10 nights of staying - Basic Price, €600 for 10 nights of staying - Free Cacellation.
From 11 nights to 20 you can put a lower daily price. €30 for the Basic Price, €40 for the Free Cancellation, for instance. Important: if you only have one fare from 1 night to 20 nights of staying for a room, this one will not show up in the results if the user searches for 21 nights of staying.
When you are inserting the fares you can also put a value for each price attribute: this value will be multiplied by the system if it is a number but the attributes never affect the total price. Attributes are usually used to give the users more information about the daily fare. This value can be different from every fare per night, just like the price.
Once you click on Insert, the price chart below the form will be updated and you can use it to edit the prices.
From this task it's also possible to see each rooms calendar, by clicking on the name, a new task will be opened with the calendars of the reservations.
The Calendar page lets you create new Reservations that were maybe collected offline. You can also Close your Room in some dates of the year so that this will not be available for booking in the front-end.
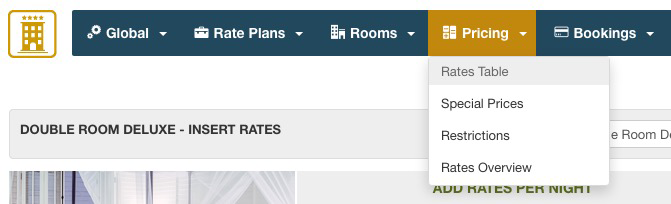
The page Rates Table is one of the most important pages of the back-end. This page will let you enter the costs per night for all your Rooms. In order to use this tool, you need to have configured at least one Type of Price and one Room. Bookings will not be allowed if there are no costs defined in this page for the number of rooms requested. For example, a search in the front-end for 7 nights of stay, will produce results only if some rooms have a cost for 7 nights defined in this page.
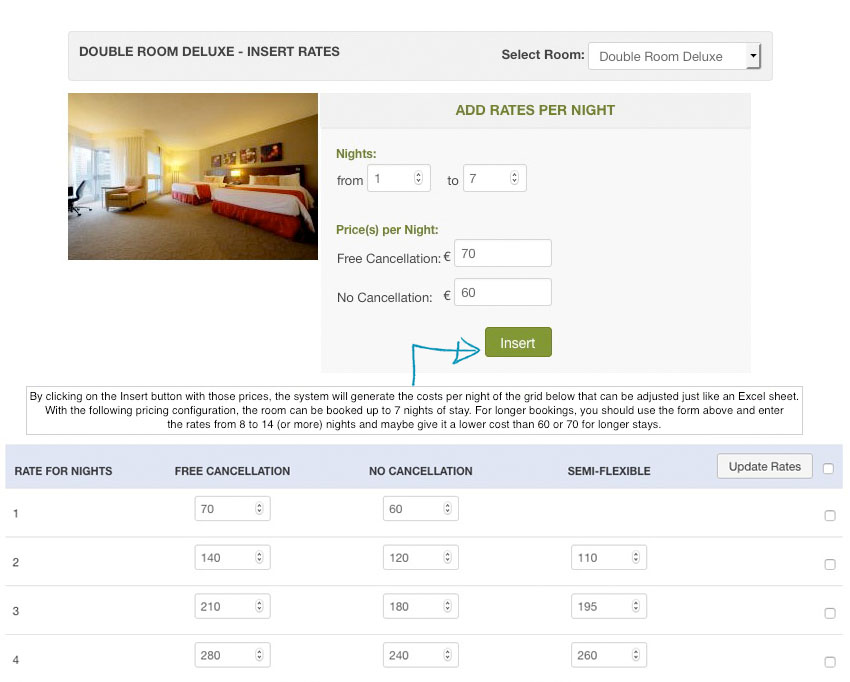
The pages shows an insert-form for creating the prices per nights as well as a grid with the costs you entered. The costs-creation-form is very simple, you have to enter the number of nights for which you are defining the costs, From and To nights. For example if you want to set a cost of €70 per night up to 7 nights of stay, you should use the form as follows:
- From 1 - To 7 nights, cost per night €70
This way the system will create the costs for 1, 2, 3, 4, 5, 6 and 7 nights of stay, multiplying the cost per night and giving a cost of €490 for 7 nights and so on. From the prices-grid at the bottom of the page you can adjust the costs for each number of nights by using the input values. Remember to separate the decimals with the dot (.) and NOT with the comma (,).
The screen shot below shows an example of how the prices can be entered:
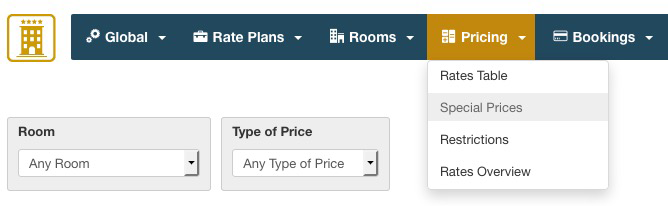
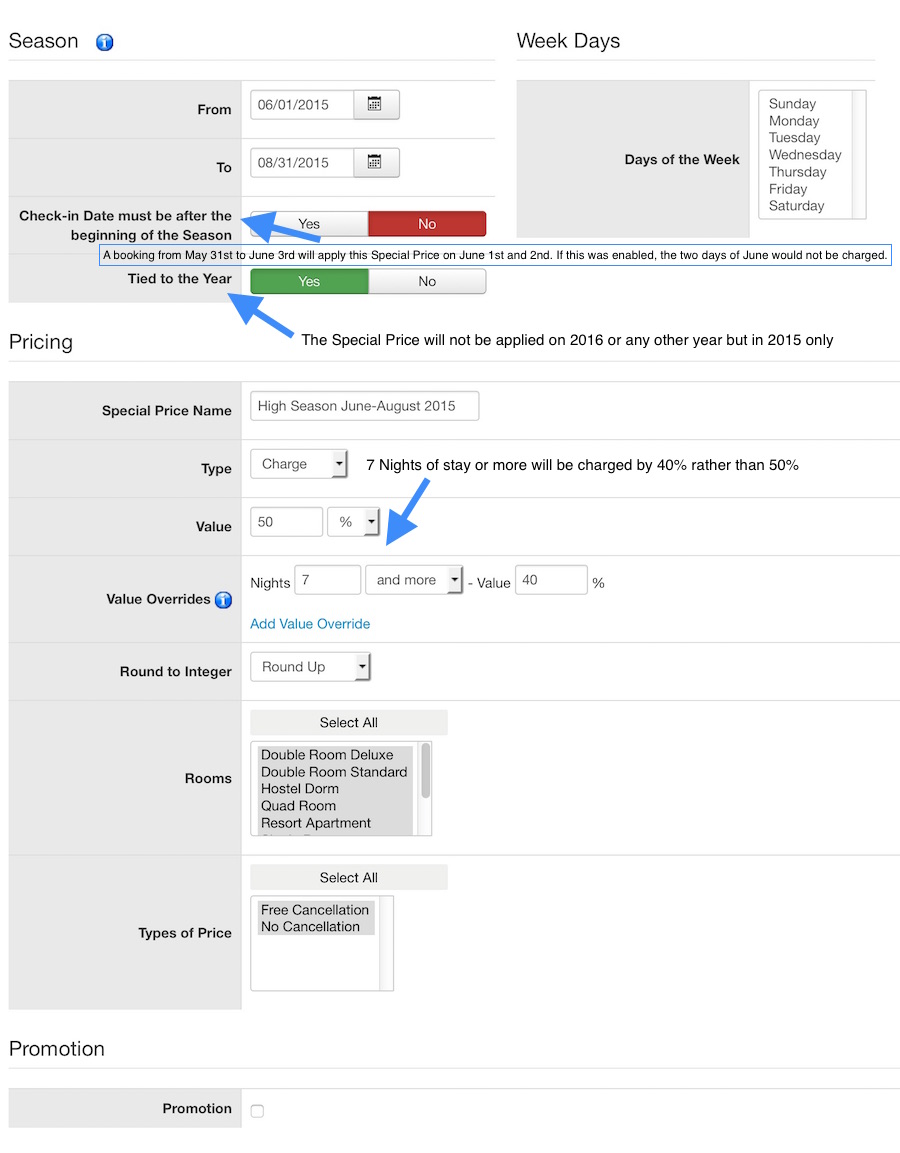
With the Special Prices you can alter the default costs per night to apply charges or discounts on certain dates of the year, seasons, weekends, holidays and any other special occasion where there is a modification to the prices. The Special Prices will modify the default costs per night defined in the Rates Table page.
For creating a Special Price it is necessary to:
- specify the Dates when this must be applied or select some days of the week when the price modification should take place
- choose if a Charge or a Discount on the base rates per night should be applied
- give it a name
- enter the percentage or fixed amount to be added or deducted from the base cost per night
- select the Rooms that will be affected for the price modification
- select the Types of Price that will be altered
You can choose to apply the Special Price on any Year or just on the one selected. Sometimes it is useful to have Special Prices not tied to a certain year only because maybe the year after you will want to apply the same price modifications without needing to load a new price inventory.
The screen shot below shows the creation page of a Special Price that applies a charge for the High Season. The prices are increased by the 50% up to 6 nights of stay while 7 nights of stay or more will have a charge of the 40%.
The Special Prices marked as Promotion will be displayed in the front-end, in the view of type VikBooking - Promotions. This function is useful to create special offers on some dates or weekends of the year, maybe by forcing a minimum number of nights to benefit of a discount.
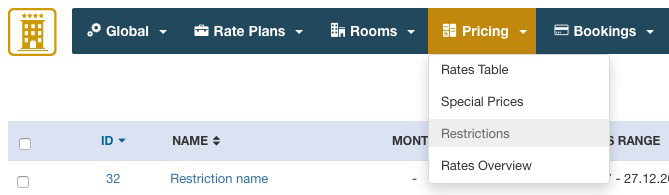
With the restrictions you can limit the minimum length of stay for a specific month of the Year or for a dates range and optionally force the arrival Day of the Week to one or two week days. For example you can create a restriction for your apartment in August, forcing the arrival day to Friday or Saturday and the minimum length of stay to 7 nights, 14 nights etc.. The minimum number of nights will be set to 1 in case it is left empty.
With the setting "Multiply Min Num of Nights" enabled the minimum number of nights will be multiplied every time this is passed. For example if you want to force the Arrival day to Saturday and the Departure day must still be on Saturday, you have to set the Minimum Number of Nights to 7 and if this setting is enabled, 8, 9, 10, 11, 12 and 13 nights of stay will not be allowed but only 14, 21, 28 etc. nights will be allowed. This is useful if you want to give your rooms only for weeks. The Maximum number of Nights is automatically calculated from the Rates Table of each room, infact, if a room does not have a rate for 28 nights, this room will not show up in the results so it will not be available. In case you want the calendar to force the Maximum Number of Nights for this month, set a number of Max Nights.
In case you are forcing the arrival day to two week days, then you can also select the allowed combinations for the arrival-departure day. For example if from the 1st of July to the 30th of September the arrival days allowed are Friday or Monday, you can allow the following combinations: Friday-Monday, Monday-Friday, Friday-Friday.
Restrictions can be applied globally to all the rooms/apartments or just to some of them.
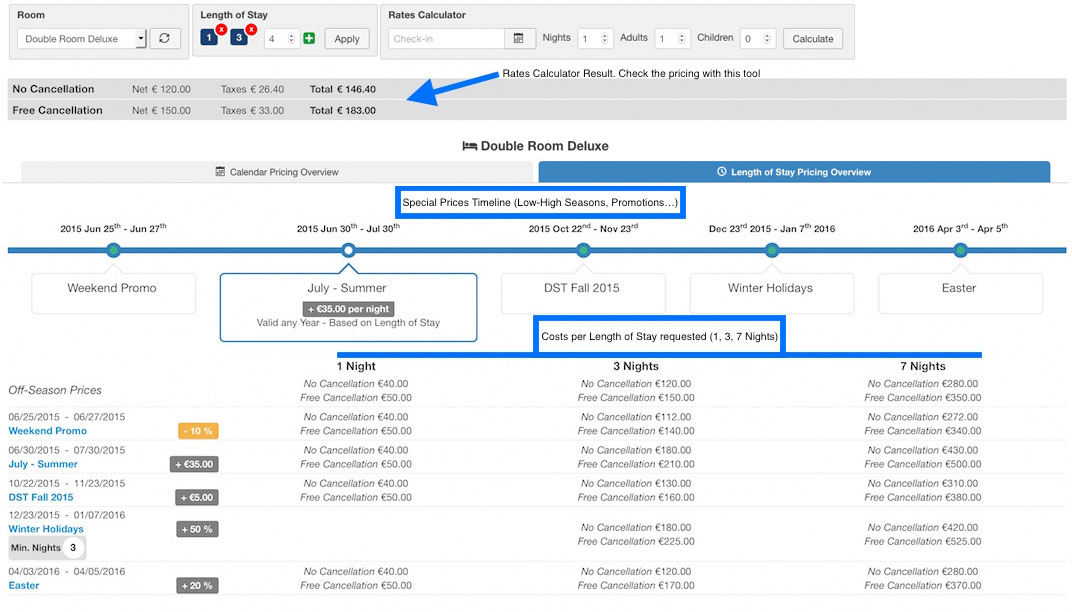
This page is very useful to have an overview of the rates, seasonal prices and restrictions applied to certain rooms. It has a Rates Calculator tool that will let you check immediately the cost that will be displayed in the front-end for bookings.
The screen shot below shows the details and functions of the page Rates Overview:
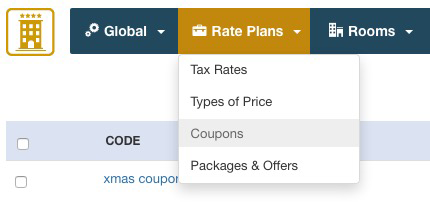
The coupon system allows you to create discounts that will be applied to the order total.
A coupon has:
A code that can be any letter or number including special characters.
The type can be permanent or gift, in the first case the discount will be always applied when this coupon is used. If the type is gift, the coupon can be used only once, after that it will be removed.
The discount can be a fixed value expressed in your currency or a percentage value.
It's also possible to apply some filters to the coupons:
The coupon can be used only for some rooms or for all the rooms.
You can restrict the date of usage of the coupon.
You can set a minimum order total in order to apply the discount.
The users will be asked to enter the coupon code in the order summary page.
Please note:
- if the coupon is granted from the Front-End, the order total will be displayed as discounted in the oder details and bookings list pages of the administrator section.
- if the coupon is granted from the Back-End, the order total will not be displayed as discounted in the order details and bookings list pages of the administrator section.
In any case, the system in the Front-End will initially calculate the total amount that needs to be paid, and, if there is any discount, this will be applied.
Therefore, discounts created both from the Front-End and the Back-End will produce the same result.
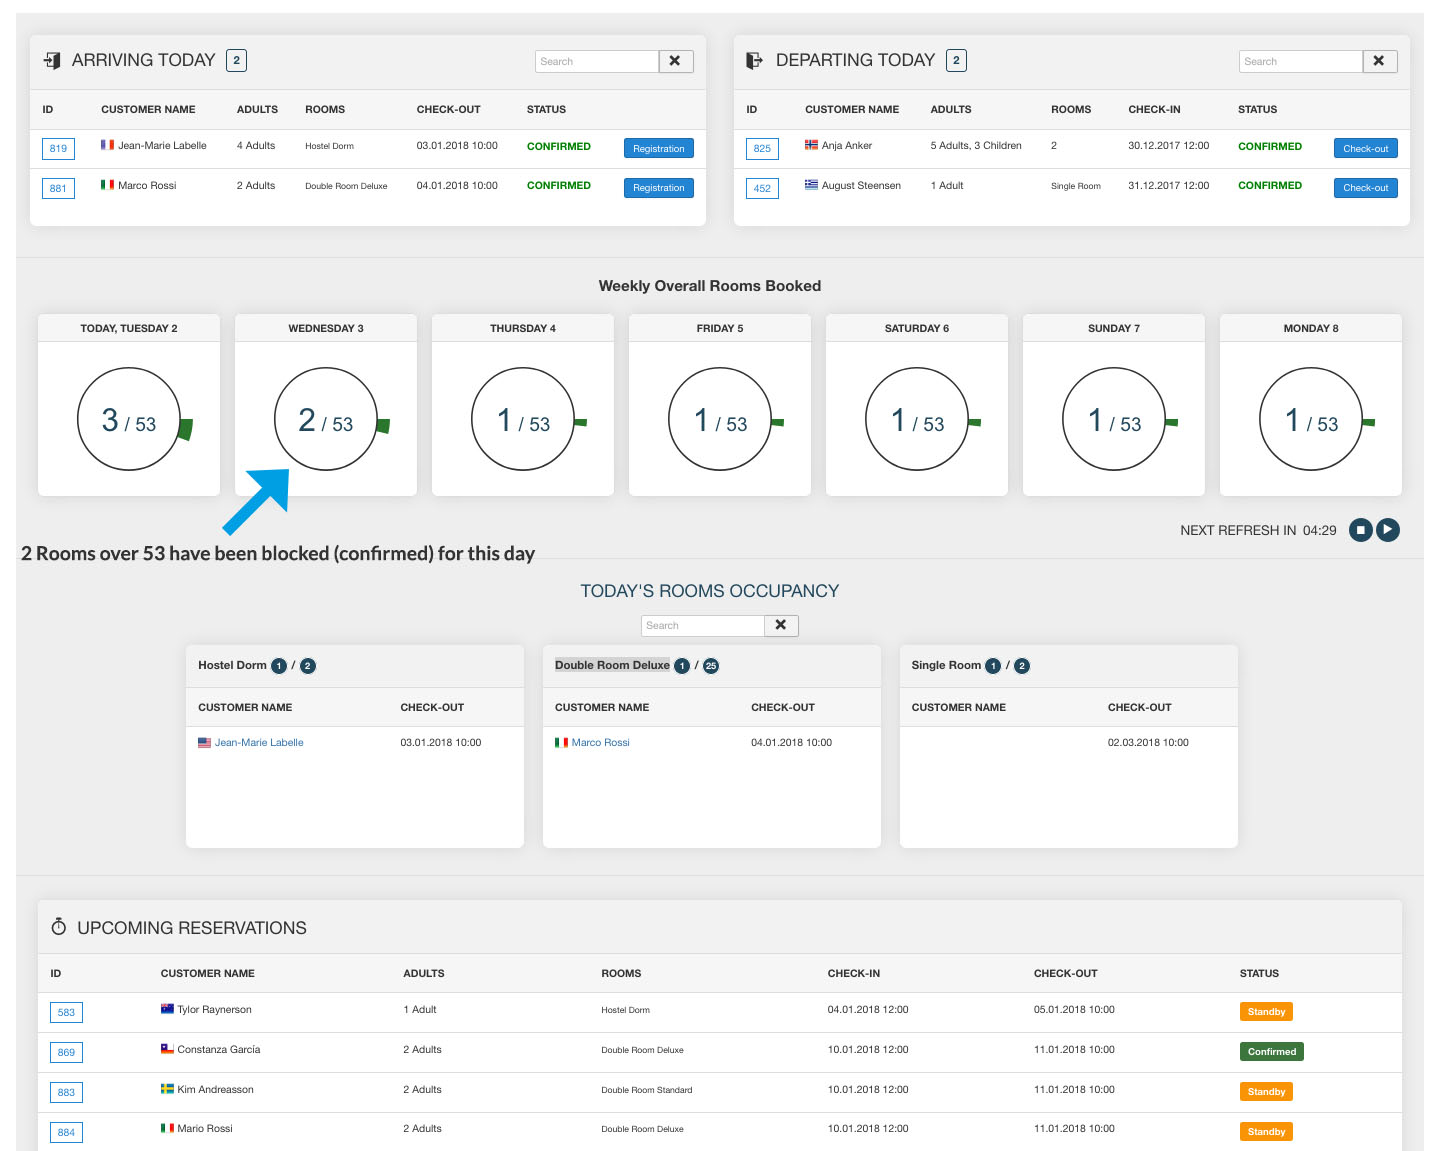
The Dashboard is the main page of the back-end of VikBooking. It is divided into 5 parts:
- Customers Checking-In Today
- Customers Checking-Out Today
- Weekly Overall Availability
- Next Bookings starting from tomorrow's date
- Rooms Currently Locked, waiting to be paid or confirmed
This page is useful for the receptionists of the Hotel to keep track of all the bookings and customers.
The page Calendar is useful for having an overview of the bookings of a certain room as well as for registering walk-in customers, to lower the availability on some dates or to close the room for sales on some dates. The page is divided into two parts:
- Quick Reservation form: for lowering the availability or for registering some bookings that were not received from the website
- Availability Calendars: get a view of up to 12 months from today's date with the bookings and the availability of a room
With the Quick Reservation form you can register some bookings as well as stop the sales (close room) on some dates. If you are registering a booking for a walk-in customer then it is recommended to use the button Fill Custom Fields so that the system can retrieve the email address of the customer as well as the Nominative, the Country and the Phone Number. Instead, if you would like to close the room on some dates and stop the bookings, you should tick the checkbox "Close Room on these Dates". This action will create a special booking that will be displayed as "Room Closed" in the All Bookings page. For re-opening the Room it is sufficient to remove this booking.

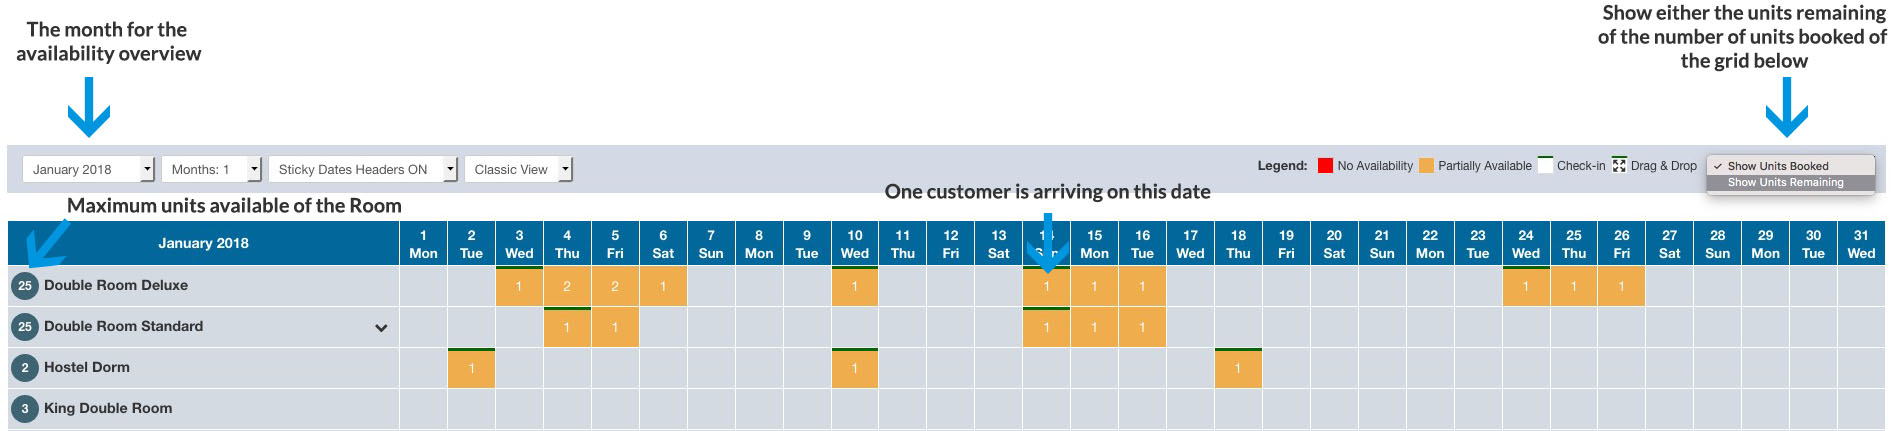
From this task you can have an Overview of the availability of each room for the selected month. The view can be filtered by the next 12 months. The number inside the red cells shows the units that are booked for that day.

This page lists all the bookings saved in the database, the ones made by your customers from the front-end, the ones created from the back-end by an administrator as well as the ones received through VikChannelManager when coming from portals.
There are various filtering and ordering types, useful for finding certain bookings.
When you remove a booking, the status will be set to Cancelled and the availability of the room will be updated, meaning that the units booked will be available again. However, the booking will be kept in the database and only by removing it again, it will be completely removed from the database.
For creating new bookings or for adjusting the availability of the rooms, use the page Calendar or the channel manager component.
All the management functions were introduced with the version 1.7. Graphs, Invoices and Cron Jobs.
Please visit the Knowledge Base section for a complete documentation of these functions.
Please remember to visit the Knowledge Base section of VikBooking to find some extra information.
VikBooking only comes in English, before you start translating the program into another language make sure you have checked that a translation for that language is not available in the Extensions AddOns page of the Answers Area.
VikBooking can be translated by simply creating a .ini language file. Follow these steps for creating the .ini language file:
Let's say we want to translate VikBooking into Spanish.
1. Copy the file /language/en-GB/en-GB.com_vikbooking.ini into the folder /language/es-ES/
2. Rename the file as /language/es-ES/es-ES.com_vikbooking.ini
3. Open the file es-ES.com_vikbooking.ini and translate all the English definitions into Spanish
4. Save the changes.
The INI file structure has changed since Joomla 1.6, make sure you respect the syntax INSTRUCTION="Definition" by opening and closing the quotes.
In case we also want to translate the Administrator side of VikBooking, we have to do the same thing but the files are located in /administrator/language/
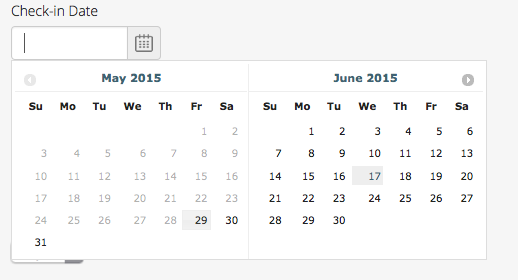
We might also want to translate the search Module of VikBooking to change words like "Check-In Date".
The module language file is: /language/en-GB/en-GB.mod_vikbooking.ini and also here we have to duplicate the file in the same way as above.
If you have installed multiple languages in your Joomla website, you can use the Translations tool in the administrator section of VikBooking to translate the names and the descriptions of the rooms, the categories, the rate plans and much more.
Please notice that there is a configuration setting for enabling the Multilanguage translations.
If the jQuery UI Calendar is not working on your website then it's because your page has a Javascript Conflict.
A Javascript file is responsible of this "conflict". Since this file could be called by either the template, a module or a plugin, a manual debug of the source code is always required in order to understand the reason of this problem.
If you are using some modules of E4J that came along with VikBooking, the first thing that you should do is disabling the setting "Load jQuery" from the Module Manager in the Administrator section.
If the problem persists we need to debug the source code of the page that is not showing the calendar.
The calendar is generated by jQuery UI, a javascript library that implements the standard functions of the javascript framework jQuery. In order to make the Calendar work, in the souce html code of the page, after the library jQuery UI another jQuery library cannot be called otherwise jQuery will be reset and your browser will "forget" the functions needed to render the Calendar.
Usually these problems are caused by Modules or Plugins because they are rendered after the component so, if they use jQuery, the file will be called after the jQuery UI library making the calendar not work.
This is an example of a correct source code that renders the jQuery UI Calendar correctly:
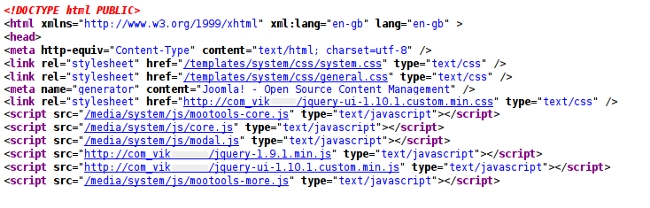
You can see that after the library jquery-ui-1.10.1.custom.min.js no more jQuery libraries are called so the browser is able to render the calendar correctly.
Here is an example of an incorrect source code that generates a Javascript error in your browser console:

Another jQuery library is called after the file jquery-ui-1.10.1.custom.min.js and this way the browser will forget how to render the calendar because jQuery has been reset.
If you are getting an error message saying something like "No room is available for booking for 14 Nights, 2 Adults, 1 Child" when making a search for a booking then it means that the rooms were not configured correctly.
These are some scenarios that could be causing the availability error and you should check the configuration in the administrator section of VikBooking:
- All the Rooms have been booked for those dates. Use the page Availability Overview to get a list of the remaining availability on those dates.
- The remaining Rooms could be temporarily set as "Locked" because a customer tried to make a booking without paying for it. This means that the status of the booking is "Stand-By" and the rooms will be kept as locked for the amount of minutes defined in the Configuration page. Remove the pending booking from the All Bookings page or use the Dashboard to unlock the rooms.
- None of the rooms is configured for accepting 2 Adults and 1 Child in this example. Please check the minimum and maximum number of Adults, Children and Total People (Adults + Children) from the Rooms List page.
- The page Rates Table doesn't have a cost for 14 nights for any of the rooms in this example. The system requires to have a cost for any number of nights allowed. If there isn't a cost for the number of nights requested (14 in this example), bookings will not be possible.
One or more of the above scenarios must be causing such error messages.
This section shows how the payment framework of VikBooking can be extended to support any kind of payment gateway.
The payment framework of VikBooking can be extended by creating a PHP file declaring the VikBookingPayment class.
The created file must be placed via FTP onto the directory: /administrator/components/com_vikbooking/payments/
In order to develop the class VikBookingPayment please follow the code example below.
<?php

defined('_JEXEC') OR die('Restricted Area');

class VikBookingPayment {

	private $order_info;
	private $params;

	public static function getAdminParameters() {
		return array();
	}

	public function __construct($order, $params=array()) {
		$this->order_info = $order;
		$this->params = $params;
	}

	public function showPayment() {
		/** See the code below to build this method */
	}

	public function validatePayment() {
		/** See the code below to build this method */
		return array();

	}

	public function afterValidation($esit = 0) {
		/** See the code below to build this method */
	}
}
?>The parameters form for the administrator section can be built through the getAdminParameters() static method. This is useful to fill in private data or credentials, required for the creation and the validation of the payment/transaction. A Merchant ID and a Signature Key are an example of parameters that should be visible as well as editable in the back-end.
The parameters of the form are returned as an array with the following structure:
[
	"param_1" : [
		"label" : "Label 1",
		"type" 	: "text",
	],
	"param_2" : [
		"label" : "Label 2",
		"type" 	: "select",
	],
]- param_1 - is one key of the array that must be unique (required).
It represents the name of the parameter to use.
- label - indicates the text to assign for the parameter in the administrator section (optional).
By placing a double slash (//) after the label, the text after will be displayed as a tip next to the field of the parameter (like "Merchant ID//this is a tip to display..."). - type - is used to render the right type of input field in the administrator section (required).
The values allowed for the type are the followings: custom, select, text. - html - will be used only when the type of the parameter is custom (optional).
- options - is an array containing all the possible values to use in the dropdown (required only when the type is select).
public static function getAdminParameters() {
	$logo_img = JURI::root().'administrator/components/com_vikbooking/payments/mypay/mypay-logo.jpg';
	return array(
		'logo' => array(
			'label' => '',
			'type' => 'custom',
			'html' => '<img src="'.$logo_img.'"/>'
		),
		'merchantid' => array(
			'label' => 'Merchant ID',
			'type' => 'text'
		),
		'testmode' => array(
			'label' => 'Test Mode',
			'type' => 'select',
			'options' => array('Yes', 'No'),
		),
	);
}
The code above will generate a parameters form in the administrator section as follows.
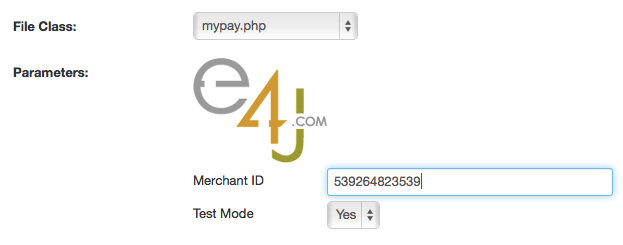
If your form doesn't come up, probably there is a syntax error on your file.
When you fill in the admin form, the parameters are stored in the array $params and you are able to get the values with the instructions below:
$merchant_id = $this->params['merchantid']; /* returns "539264823539" */
$test = $this->params['testmode']; /* returns "Yes" */The $order_info object is a mapped key/val array with the order information needed to complete the payment process. You can see below all the available keys of the array.
| Param | Type | Description |
|---|---|---|
| details | array | Array containing sub-parameters for the record of this reservation. |
| custmail | alphanumeric | The email address of the customer. |
| transaction_currency | char(3) | The currency of the amount (3-letter ISO 4217 code). The default is EUR. |
| return_url | string | The return url to come back to your shop from the bank on successful transactions. |
| error_url | string | The error url to come back to your shop from the bank on failed transactions. |
| notify_url | string | The notification url to validate the transaction data sent from the bank. This URL invokes the validatePayment method of your gateway. |
| total_to_pay | decimal | The total amount to pay as decimal (ex. 135.50). |
You can retrieve the information of the $order_info array with the example below.
$uniq_id = $this->order_info['details']['sid']."-".$this->order_info['details']['ts'];The method showPayment() of the object VikBookingPayment is invoked every time a user visits the page of a reservation with PENDING Status. Here you need to echo the HTML form that points to the payment creation url of your bank gateway.
In this method it is also possible to make calls via cURL to retrieve tokens or to self submit the form to receive additional info to send to the bank.
public function showPayment() {

	$merchant_id = $this->params['merchantid'];

	$action_url = "https://yourbankgateway.com/";
	if( $this->params['testmode'] == 'Yes' ) {
		$action_url = "https://test.yourbankgateway.com/";
	}

	$form='<form action="'.$action_url.'" method="post">';
	// put here all the required fields of your gateway
	$form.='<input type="hidden" name="your_post_data_merchantid" value="'.$merchant_id.'"/>';
	$form.='<input type="hidden" name="your_post_data_amount" value="'.$this->order_info['total_to_pay'].'"/>';
	$form.='<input type="hidden" name="your_post_data_notifyurl" value="'.$this->order_info['notify_url'].'"/>';
	$form.='<input type="hidden" name="your_post_data_description" value="'.$this->order_info['transaction_name'].'"/>';
	// print a button to submit the payment form
	$form.='<input type="submit" name="_submit" value="Pay Now!" />';
	$form.='</form>';

	echo $form;

}The validatePayment() method is used to validate the transaction details sent from the bank. This method is invoked by the system every time the NotifyURL is visited (the one described in the showPayment() method). Usually the data are sent via POST method, and you can access them by simply using the $_POST super-global variable. Some gateways require a signature validation to make sure the transaction wasn't corrupted. The signature validation can be created only following the instructions on the official documentation of your bank.
This method must return a key/value array with the status of the transaction. The possible keys of the array are the followings.
| Param | Type | Description |
|---|---|---|
| verified | boolean | The status of the transaction. 1/true in case of success, otherwise 0/false. |
| tot_paid | decimal | The real amount paid by the customer, should be returned by the Gateway (ex, 102.75). |
| log | string | A log message sent to the administrator in case of failure. The log can contain any value returned from the Bank and it should be as specific as possible. When not empty, the system will store the logs in the db and they will be visible from the order details page of the back-end. |
Any different values in the returned array will be completely ignored during the validation of the transaction.
public function validatePayment() {
	$array_result = array();
	$array_result['verified'] = 0;
	$array_result['tot_paid'] = ''; /** This value will be stored in the DB */

	/** In case of error the log will be sent via email to the admin */

	$status = $_POST['status'];
	/** Process your gateway response here */
	if($status == 'success') {
		$array_result['verified'] = 1;
		/** Set a value for $array_result['tot_paid'] */
		$array_result['tot_paid'] = $_POST['amount'];
	} else {
		$array_result['log'] = "Transaction Error!\n".$_POST['error_msg'];
	}

	/** Return the array to VikBooking */
	return $array_result;
}The afterValidation($esit) method is generally used to display a message and to redirect the gateway to the order summary view in case of success or failure. Please notice that this method should be in your Class only in case the Bank Gateway will not redirect the user to the ReturnURL. Also, this method, if it exists in the Class, will be invoked by the system after the validatePayment(). The $esit argument is a boolean value that represents the status of the transaction. In case of success (1/true) you should print a positive message and redirect the gateway to the return_url address, otherwise (0/false) you should print an error message and redirect the gateway to the error_url address. Remember also to put an exit or die rule at the end of the method to completely stop the flow.
public function afterValidation($esit = 0) {

	$mainframe = JFactory::getApplication();
	//Build the URL to the order details page
	$redirect_url = 'index.php?option=com_vikbooking&task=vieworder&sid='.$this->order_info['sid'].'&ts='.$this->order_info['ts'];

	if($esit < 1) {
		JError::raiseWarning('', 'The payment was not verified, please try again.');
		$mainframe->redirect($redirect_url);
	} else {
		$mainframe->enqueueMessage('Thank you! The payment was verified successfully.');
		$mainframe->redirect($redirect_url);
	}

	exit;
	//
}
You can get HERE the complete code of this example gateway.
The SMS gateways for VikBooking can be extended by creating a PHP file containing the VikSmsApi class.
The generated file should be uploaded via FTP onto the following directory:
/administrator/components/com_vikbooking/smsapi/
Follow the schema below to see the structure of the Class File:
<?php
defined('_JEXEC') OR die('Restricted Area');

class VikSmsApi {

	private $order_info;
	private $params;
	private $log = '';

	public static function getAdminParameters() {
		return array();
	}

	public function __construct($order, $params=array()) {
		$this->order_info=$order;
		$this->params = ( !empty($params) ) ? $params : $this->params;
	}

	public function sendMessage( $phone_number, $msg_text ) {
		/** See the code below to build this method */
		return new stdClass;
	}

	public function estimate( $phone_number, $msg_text ) {
		/** See the code below to build this method */
		return new stdClass;
	}

	public function validateResponse($response_obj) {
		/** See the code below to build this method */
		return true;
	}

	public function getLog() {
		return $this->log;
	}

}

?>The parameters form for the administrator can be built through the getAdminParameters() static method, to fill in private data required to the creation and validation of the payment, like API Key and API Secret.
The parameters of the form are returned as an array with the following structure:
[
	"param_1" : [
		"label" : "Label 1",
		"type" 	: "text",
	],
	"param_2" : [
		"label" : "Label 2",
		"type" 	: "select",
	],
]- param_1 is the key of the array and have to be unique (required).
It represents the name of the parameter to use.
- label indicates the text to assign for the parameter in the administrator section (optional).
By placing a double slash (//) after the label, the next text will be displayed as a tip near the field of the parameter (like "Sender//max 11 characters"). - type is used to render the right type of input in the administrator section (required).
The assumed value can be only one of the followings: custom, select, text. - html will be used only when the type of the parameter is custom (optional).
- options is an array containing all the possible values to use in the dropdown (required only when the type is select).
public static function getAdminParameters() {
	return array(
		'apikey' => array(
			'label' => 'API Key',
			'type' => 'text'
		),

		'apisecret' => array(
			'label' => 'API Secret',
			'type' => 'text'
		),

		'sender' => array(
			'label' => 'Sender Name//max 11 characters',
			'type' => 'text'
		),

		'sandbox' => array(
			'label' => 'Sandbox',
			'type' => 'select',
			'options' => array('NO', 'YES')
		)
	);
}
The code above will generate a parameters form in the administrator section as follows.
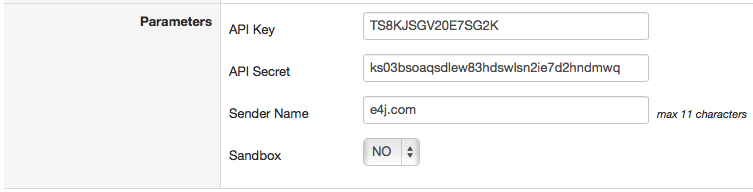
If your form doesn't show up, then you probably have a syntax error in your file.
After filling in the Gateway parameters, they will be available in the array $params and you will be able to access these values through the code below:
$api_key = $this->params['apikey']; /* returns "TS8KJSGV20E7SG2K" */
$api_secret = $this->params['apisecret']; /* returns "ks03bsoaqsdlew83hdswlsn2ie7d2hndmwq" */
$sender_name = $this->params['sender']; /* returns "e4j.com" */
$sandbox = $this->params['sandbox']; /* returns "NO" */The method sendMessage($phone_number, $msg_text) of the object VikSmsApi is invoked every time an order becomes CONFIRMED, like after a payment.Through this function, you should submit via POST (probably) all the necessary variables for the authentication on the Gateway and the content of the message, including the recipient phone number. Generally, cURL is the safest method to submit variables to a remote Gateway but this depends on the requirements of the gateway you are working on.
The sendMessage function requires 2 arguments:
- $phone_number - (string) the phone number of the recipient. This value must be validated before sending the message, as it could be missing the prefix or it could contain invalid characters (like @ or /)
- $msg_text - (string) the full text to send to the customer. A lot of providers allow to send max 160 characters per message, please keep this limit in mind.
The code below is just an example of how a cURL Request could establish the connection with the SMS gateway and send the message.
public function sendMessage($phone_number, $msg_text) {
	$phone_number = $this->sanitizePhoneNumber($phone_number);

	if( $this->params['sandbox'] == "NO" ) {
		$this->params['sandbox'] = 0;
	} else {
		$this->params['sandbox'] = 1;
	}

	$request = array(
		"apikey" => $this->params['apikey'],
		"apisecret" => $this->params['apisecret'],
		"from" => $this->params['sender'],
		"to" => $phone_number,
		"msg" => $msg_text,
		"sandbox" => $this->params['sandbox']
	);

	$json = json_encode($request);

	$curl_opts = array(
                CURLOPT_POST => true,
                CURLOPT_POSTFIELDS => $json,
                CURLOPT_RETURNTRANSFER => true,
                CURLOPT_HTTPHEADER => array(
                        'Accept: application/json',
                        'Content-Type: application/json;charset=UTF-8',
                        'Content-Length: '.strlen($json)
                ),
                CURLOPT_VERBOSE => true,
        );

	$ch = curl_init('https://secure.sms.fakeprovider.com/send');
	curl_setopt_array($ch, $curl_opts);
	$response = curl_exec($ch);

	return json_decode($response);
}The sanitizePhoneNumber function used above is not a native function of the VikSmsApi class, so you would have to write this method on your own code.
This is just an example to see how a phone number could be parsed and sanitized:
protected function sanitizePhoneNumber($phone_number) {
	$str = '';
	for( $i = 0; $i < strlen($phone_number); $i++ ) {
		if( ($phone_number[$i] >= '0' && $phone_number[$i] <= '9') || $phone_number[$i] == '+' ) {
			$str .= $phone_number[$i]; // copy only numbers and plus character
		}
	}

	$default_prefix = '+1'; // US, Canada phone prefix

	if( $phone_number[0] != '+' ) {
		// $phone_number doesn't contain the phone prefix. Checking if it starts with 00 would be smart as well
		$str = $default_prefix.$str;
	}

	return $str;
}The validateResponse($response_obj) method is used to validate the object returned by the gateway during the sending of the message. Some gateways return an object containing a short error message and the http status code.
{
	"httpcode" : 200,
	"errmsg" : "",
}
{
	"httpcode" : 401,
	"errmsg" : "BAD_CREDENTIALS",
}
{
	"httpcode" : 402,
	"errmsg" : "BAD_CREDIT",
}
While, sometimes, the object returned is a simple boolean value (true/false).
In this method you have to return only a boolean value (true/false) to tell the framework whether the message was sent. By returning TRUE, no errors will be raised or notified, the error will be sent via e-mail to the administrator otherwise. Please notice that the errors to be returned, must be placed in the $log attribute.
//in this example, the method requires an object as first and only argument
public function validateResponse($response_obj) {
	if( $response_obj->httpcode == 200 ) {
		return true;
	}
	$this->log .= $response_obj->errmsg;
	return false;
}The estimate($phone_number, $msg_text) is an optional method used to retrieve the remaining credit from the back-end of the extension. It is not a mandatory method and the class could not have it. Not every provider (SMS Gateway) allows such a request.
$phone_number and $msg_text are only used as example from the gateway.
The returned value of this function must be a string that will be displayed in the back-end.
Most of the times, the structure of the estimate function is similar to the sendMessage method, it usually makes a call with some different variables to the SMS Gateway of the provider.
public function estimate($phone_number, $msg_text) {
	$fixedResponse = '----';
	$phone_number = $this->sanitizePhoneNumber($phone_number);

	$request = array(
		"apikey" => $this->params['apikey'],
		"apisecret" => $this->params['apisecret'],
		"from" => $this->params['sender'],
		"to" => $phone_number,
		"msg" => $msg_text,
	);

	$json = json_encode($request);

	$curl_opts = array(
                CURLOPT_POST => true,
                CURLOPT_POSTFIELDS => $json,
                CURLOPT_RETURNTRANSFER => true,
                CURLOPT_HTTPHEADER => array(
                        'Accept: application/json',
                        'Content-Type: application/json;charset=UTF-8',
                        'Content-Length: '.strlen($json)
                ),
                CURLOPT_VERBOSE => true,
        );

	$ch = curl_init('https://secure.sms.fakeprovider.com/estimate');
	curl_setopt_array($ch, $curl_opts);
	$response = curl_exec($ch);
	$response = json_decode($response);

	if(is_object($response)) {
		$fixedResponse = (float)$response->credit;
	}

	return $fixedResponse;
}This section is only for PHP experts. The documentation below shows the requirement of the Class File to extend the Cron Jobs Framework of the extension. By creating a PHP file that declares the class below, you will gain access to the whole framework and you will be able to do any sort of operation by executing queries on the database and by launching commands directly from your own PHP file.
The Jobs that can be executed by VikBooking, after scheduling them with your Cron Server Utility, must be placed in the directory below:
/administrator/components/com_vikbooking/cronjobs/
Follow the schema below to see the structure of the Class File:
<?php
defined('_JEXEC') OR die('Restricted Area');

class VikCronJob {

	public $cron_id;
	public $params;
	public $debug;
	private $checktype;
	private $cron_data;
	private $flag_char;
	private $exec_flag_char;
	public $log;

	/**
	* This method defines the parameters of the job for the back-end setup
	*/
	static function getAdminParameters () {
		return array(
				'cron_lbl' => array('type' => 'custom', 'label' => '', 'html' => '<h4><i class="vboicn-mail4"></i><i class="vboicn-alarm"></i>Your Custom Cron Job</h4>'),
				'checktype' => array('type' => 'select', 'label' => 'Execution Type:', 'options' => array('checkin', 'payment', 'checkout')),
				'remindbefored' => array('type' => 'number', 'label' => 'Remind Type://Days in Advance from Check-in/Check-out', 'default' => '2', 'attributes' => array('style' => 'width: 60px !important;')),
				'subject' => array('type' => 'text', 'label' => 'Subject:', 'default' => 'eMail Subject'),
				'tpl_text' => array('type' => 'textarea', 'label' => 'Message:', 'default' => 'Dear Customer,'."\n".'This is an automated message to remind you...', 'attributes' => array('id' => 'tpl_text', 'style' => 'width: 70%; height: 80px;')),
		);
	}

	/**
	* The constructor method requires two arguments: the ID and the parameters array of the job coming from the back-end setup
	* VikBooking will do everything by itself but this method must have a similar structure to this example
	*/
	public function __construct ($cron_id, $params = array()) {
		$this->cron_id = $cron_id;
		$this->params = $params;
		$this->debug = false; //debug is set to true by the back-end manual execution to print the debug messages
		$this->checktype = $params['checktype'] == 'payment' ? 'payment' : ($params['checktype'] == 'checkout' ? 'checkout' : 'checkin');
		$this->cron_data = array();
		$this->flag_char = array();
		$this->exec_flag_char = array();
		$this->params['remindbefored'] = intval($this->params['remindbefored']);
	}

	/**
	* This method must always exist. It's the main method called by the framework
	*/
	public function run () {
		$dbo = JFactory::getDBO();
		if(!($this->params['remindbefored'] > 0)) {
			$this->log = 'Days in Advance: empty or invalid';
			return false;
		}
		//Set the cron job data in the class variable $this->cron_data
		$this->getCronData();
		//do your queries
		//.......

		//output debug messages for the manual execution from the back-end
		if($this->debug) {
			echo '<p>The job is running</p>';
			echo '<span>my command is ....</span>';
		}

		//Set logs for the Execution Logs
		$log_str = '';
		$log_str .= 'No bookings found....';
		if(!empty($log_str)) {
			$this->log = $log_str;
		}
		//you do not need to return anything, just execute what's necessary
		return true;
	}

	/**
	* This method must always exist. It's called after the cron has been executed so after the run() method
	*/
	public function afterRun ($extra = array()) {
		$dbo = JFactory::getDBO();
		$log_str = '';
		if(strlen($this->log) && count($this->cron_data) > 0) {
			$log_str = date('c')."\n".$this->log."\n----------\n".$this->cron_data['logs'];
		}
		//this variable could be populated from other class-variabled set by the run() method.
		//Useful to store information in JSON format about some Booking IDs that were notified by this execution
		$new_flag_str = '';

		//update cron record
		$q = "UPDATE `#__vikbooking_cronjobs` SET `last_exec`=".time().(!empty($log_str) ? ", `logs`=".$dbo->quote($log_str) : "").(!empty($new_flag_str) ? ", `flag_char`=".$dbo->quote($new_flag_str) : "")." WHERE `id`=".(int)$this->cron_id.";";
		$dbo->setQuery($q);
		$dbo->Query($q);
	}

	/**
	* This method is optional but this example uses it in the run() method
	* Useful to get the flag_char from previous executions
	*/
	private function getCronData() {
		$dbo = JFactory::getDBO();
		$q = "SELECT * FROM `#__vikbooking_cronjobs` WHERE `id`=".(int)$this->cron_id.";";
		$dbo->setQuery($q);
		$dbo->Query($q);
		if($dbo->getNumRows() == 1) {
			$this->cron_data = $dbo->loadAssoc();
			if(!empty($this->cron_data['flag_char'])) {
				$this->flag_char = json_decode($this->cron_data['flag_char'], true);
			}
		}
	}

	/**
	* Build here any other needed method. You have full access to the whole framework
	*/

}

?>Please visit the Knowledge Base Section to find some useful tips for the most common customizations (CSS, Language Definitions, HTML Structure).


 留言列表
留言列表